Build-your-own Shipping Container Cabin Checklist

Our “Build-your-Own Shipping Container Cabin Checklist” provides you with the methodology we use for our projects. We will custom design your requirements, share our R&D, techniques and tricks to building your own Shipping Container Cabin seamlessly. Most importantly, our learnings from this 7-container project have been documented in detail to ensure other builds can avoid some of the surprises we have encountered.

BUILD-YOUR-OWN SHIPPING CONTAINER CABIN CHECKLIST:

      1. Concept and Design
      2. Needs, Wants, and Philosophies
        • Low cost
        • High security
        • Sustainable, independent, and unique
        • Maximize and exploit inherent benefits of container structures
        • Turn the inherent weaknesses of containers into strengths
      3. Design Strategies
        • Insulation and Interior Strategy for container ceilings, walls, floors, inside versus outside, cold climate and condensation considerations, thermal break concept, R value of steel
        • Insulating Coatings, fundamental research and findings
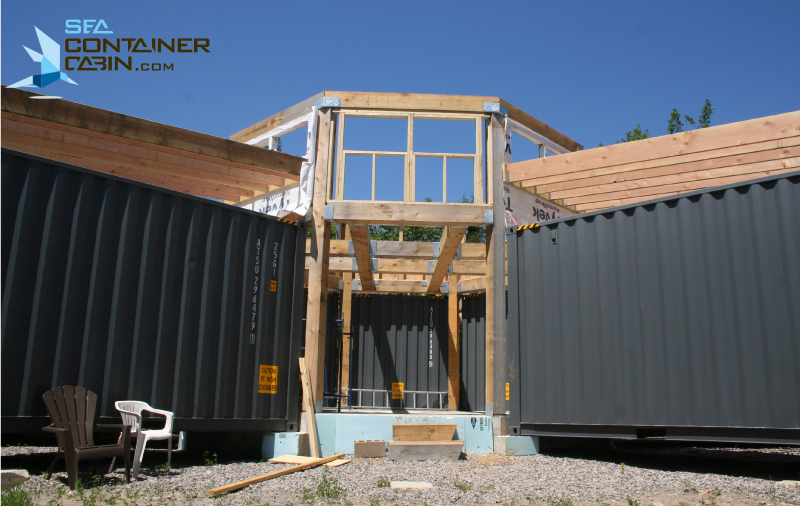
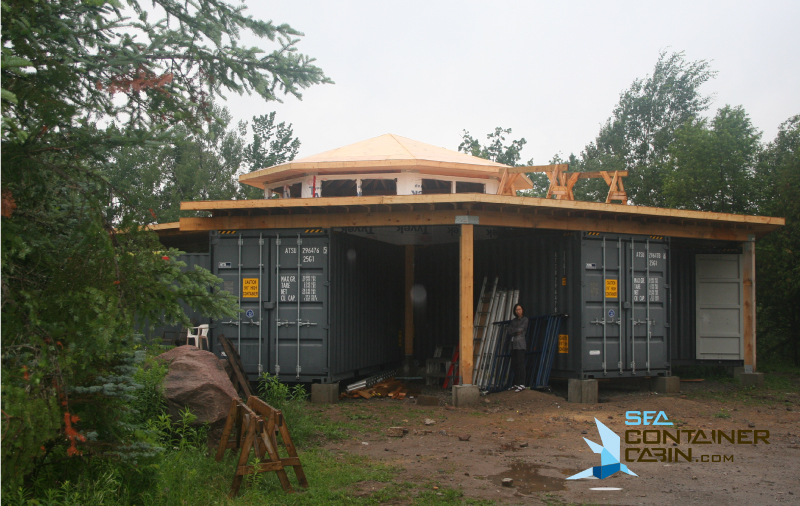
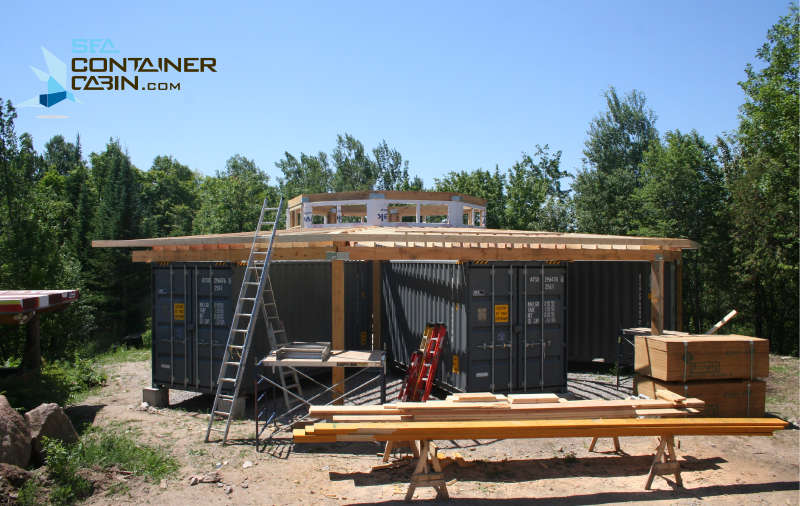
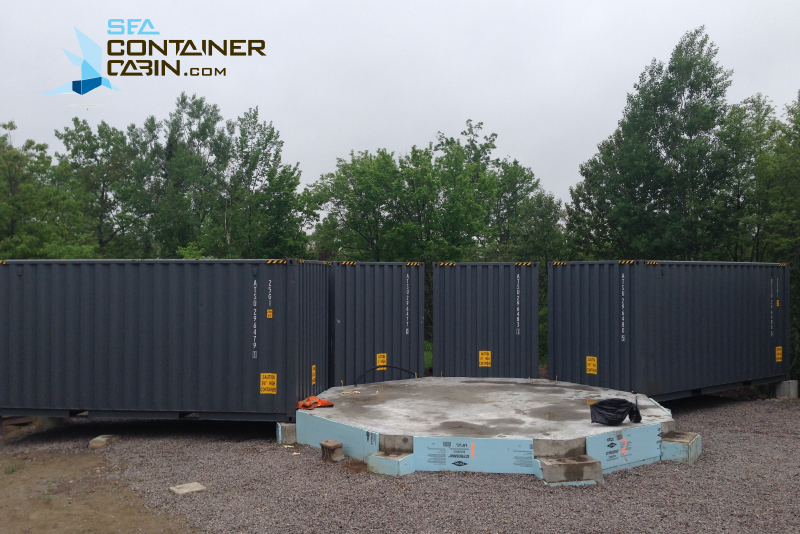
        • Center Great Room, features and functions
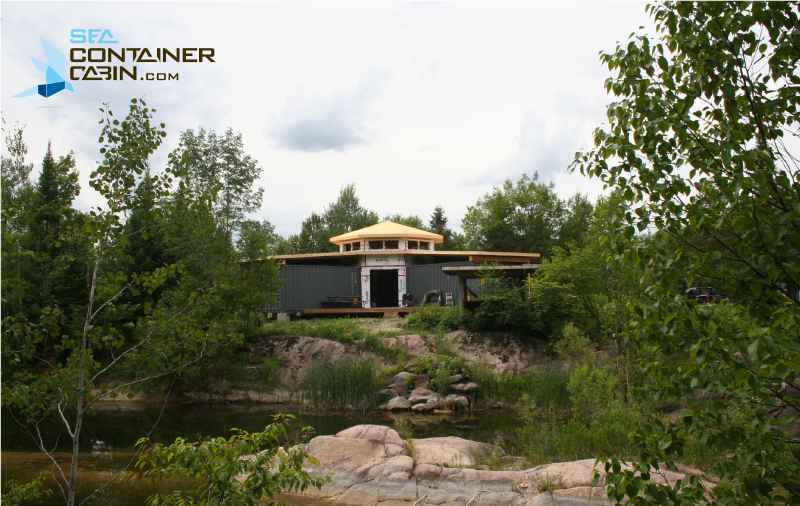
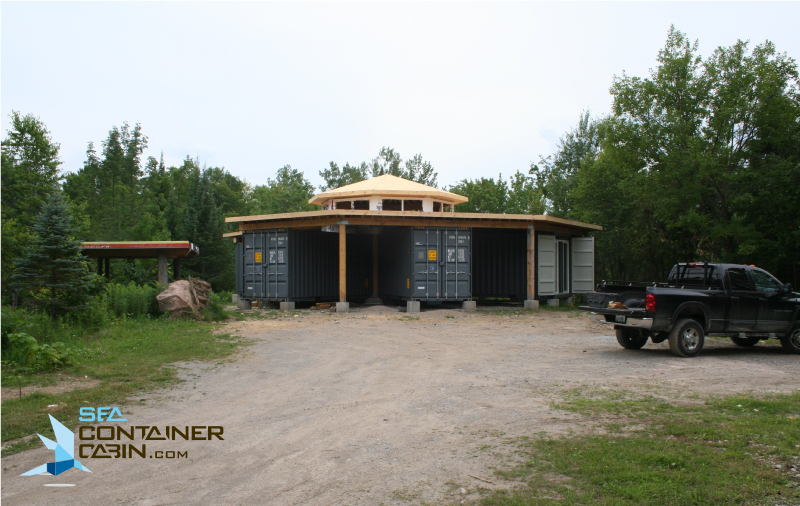
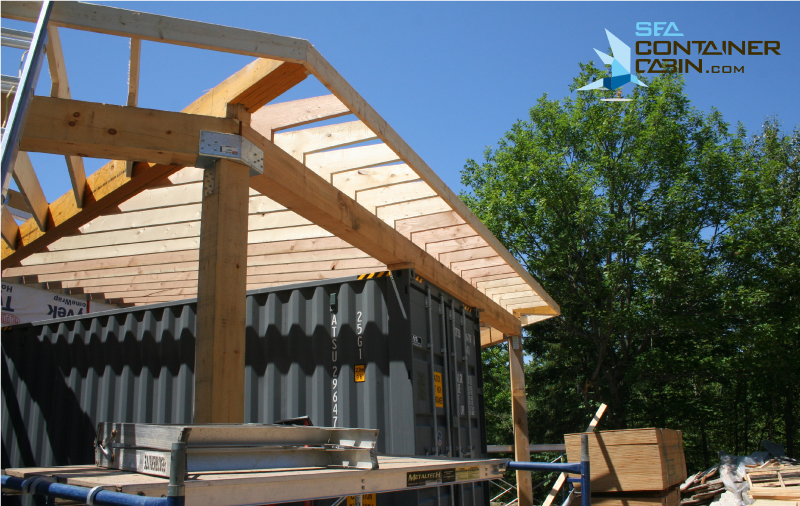
        • Roofing System and Cupula Effect
        • Off grid features
        • Stepwise Construction Approach
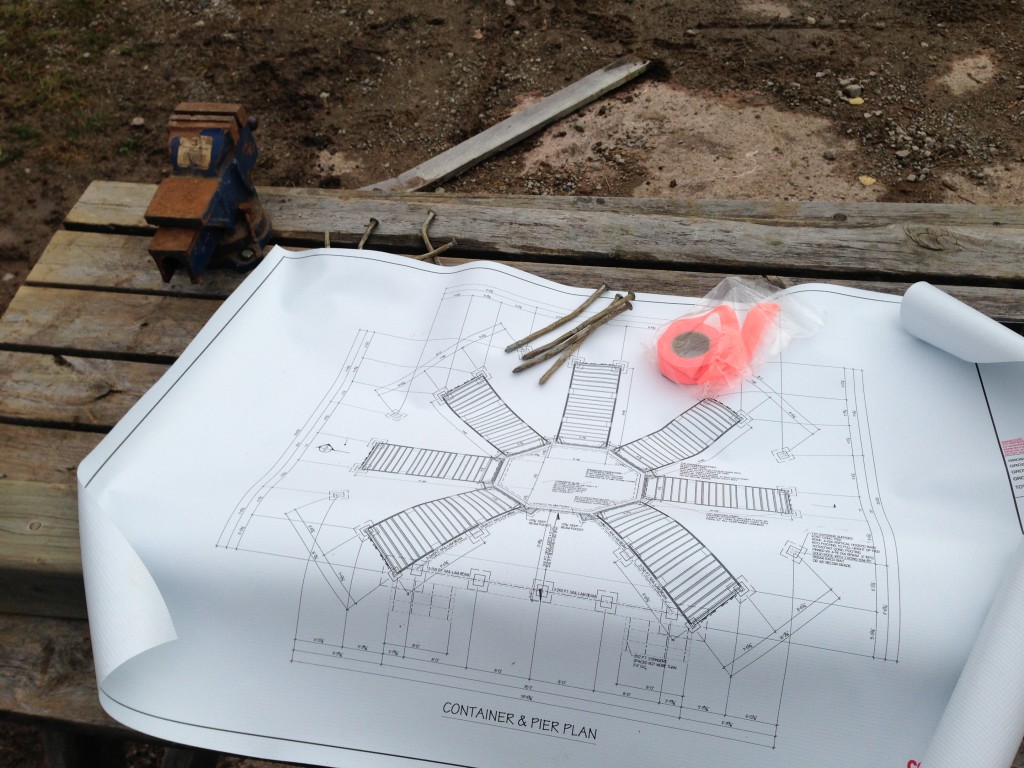
      4. Concept Drawings
        • Google SketchUp concept PDF images
        • Google SketchUp electronic working files for additional views and customization
        • Final AutoCAD rendered concept drawings in PDF format, basis for Construction Drawings
      5. Containers and Materials Selection
        • High cubes versus standard cubes
        • New “one-trip” containers versus used “wind and water tight” units
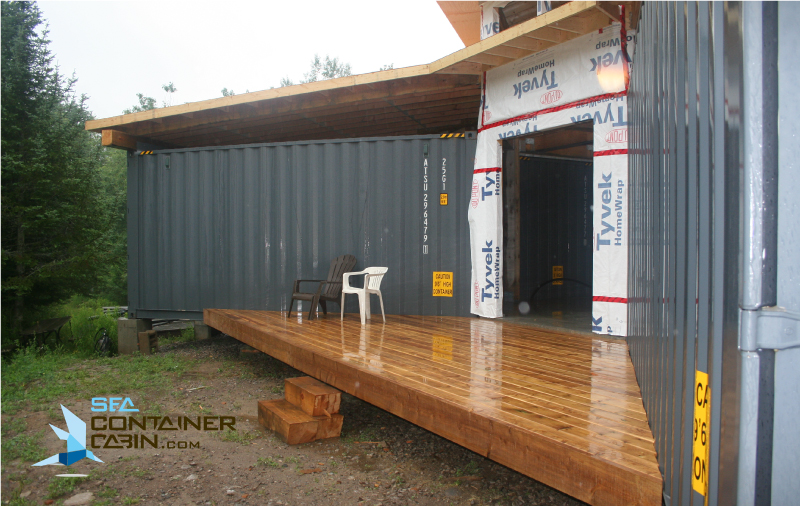
        • Treated plywood floors – understanding pesticide treatments, construction techniques to encapsulate, alternative measures
      6. Off Grid, Sustainability and Reliability Features
        • Interior water tower
        • Solar water pumping
        • Plumbing with quick and natural draining
        • Wood fired sauna and shower area
        • Patio mist natural air conditioning
        • Optimizing power supply and demand
          • DC versus AC
          • LED lighting and DC alignment
          • Refrigeration options, highest efficiency designs, DC options
          • DC HVAC options
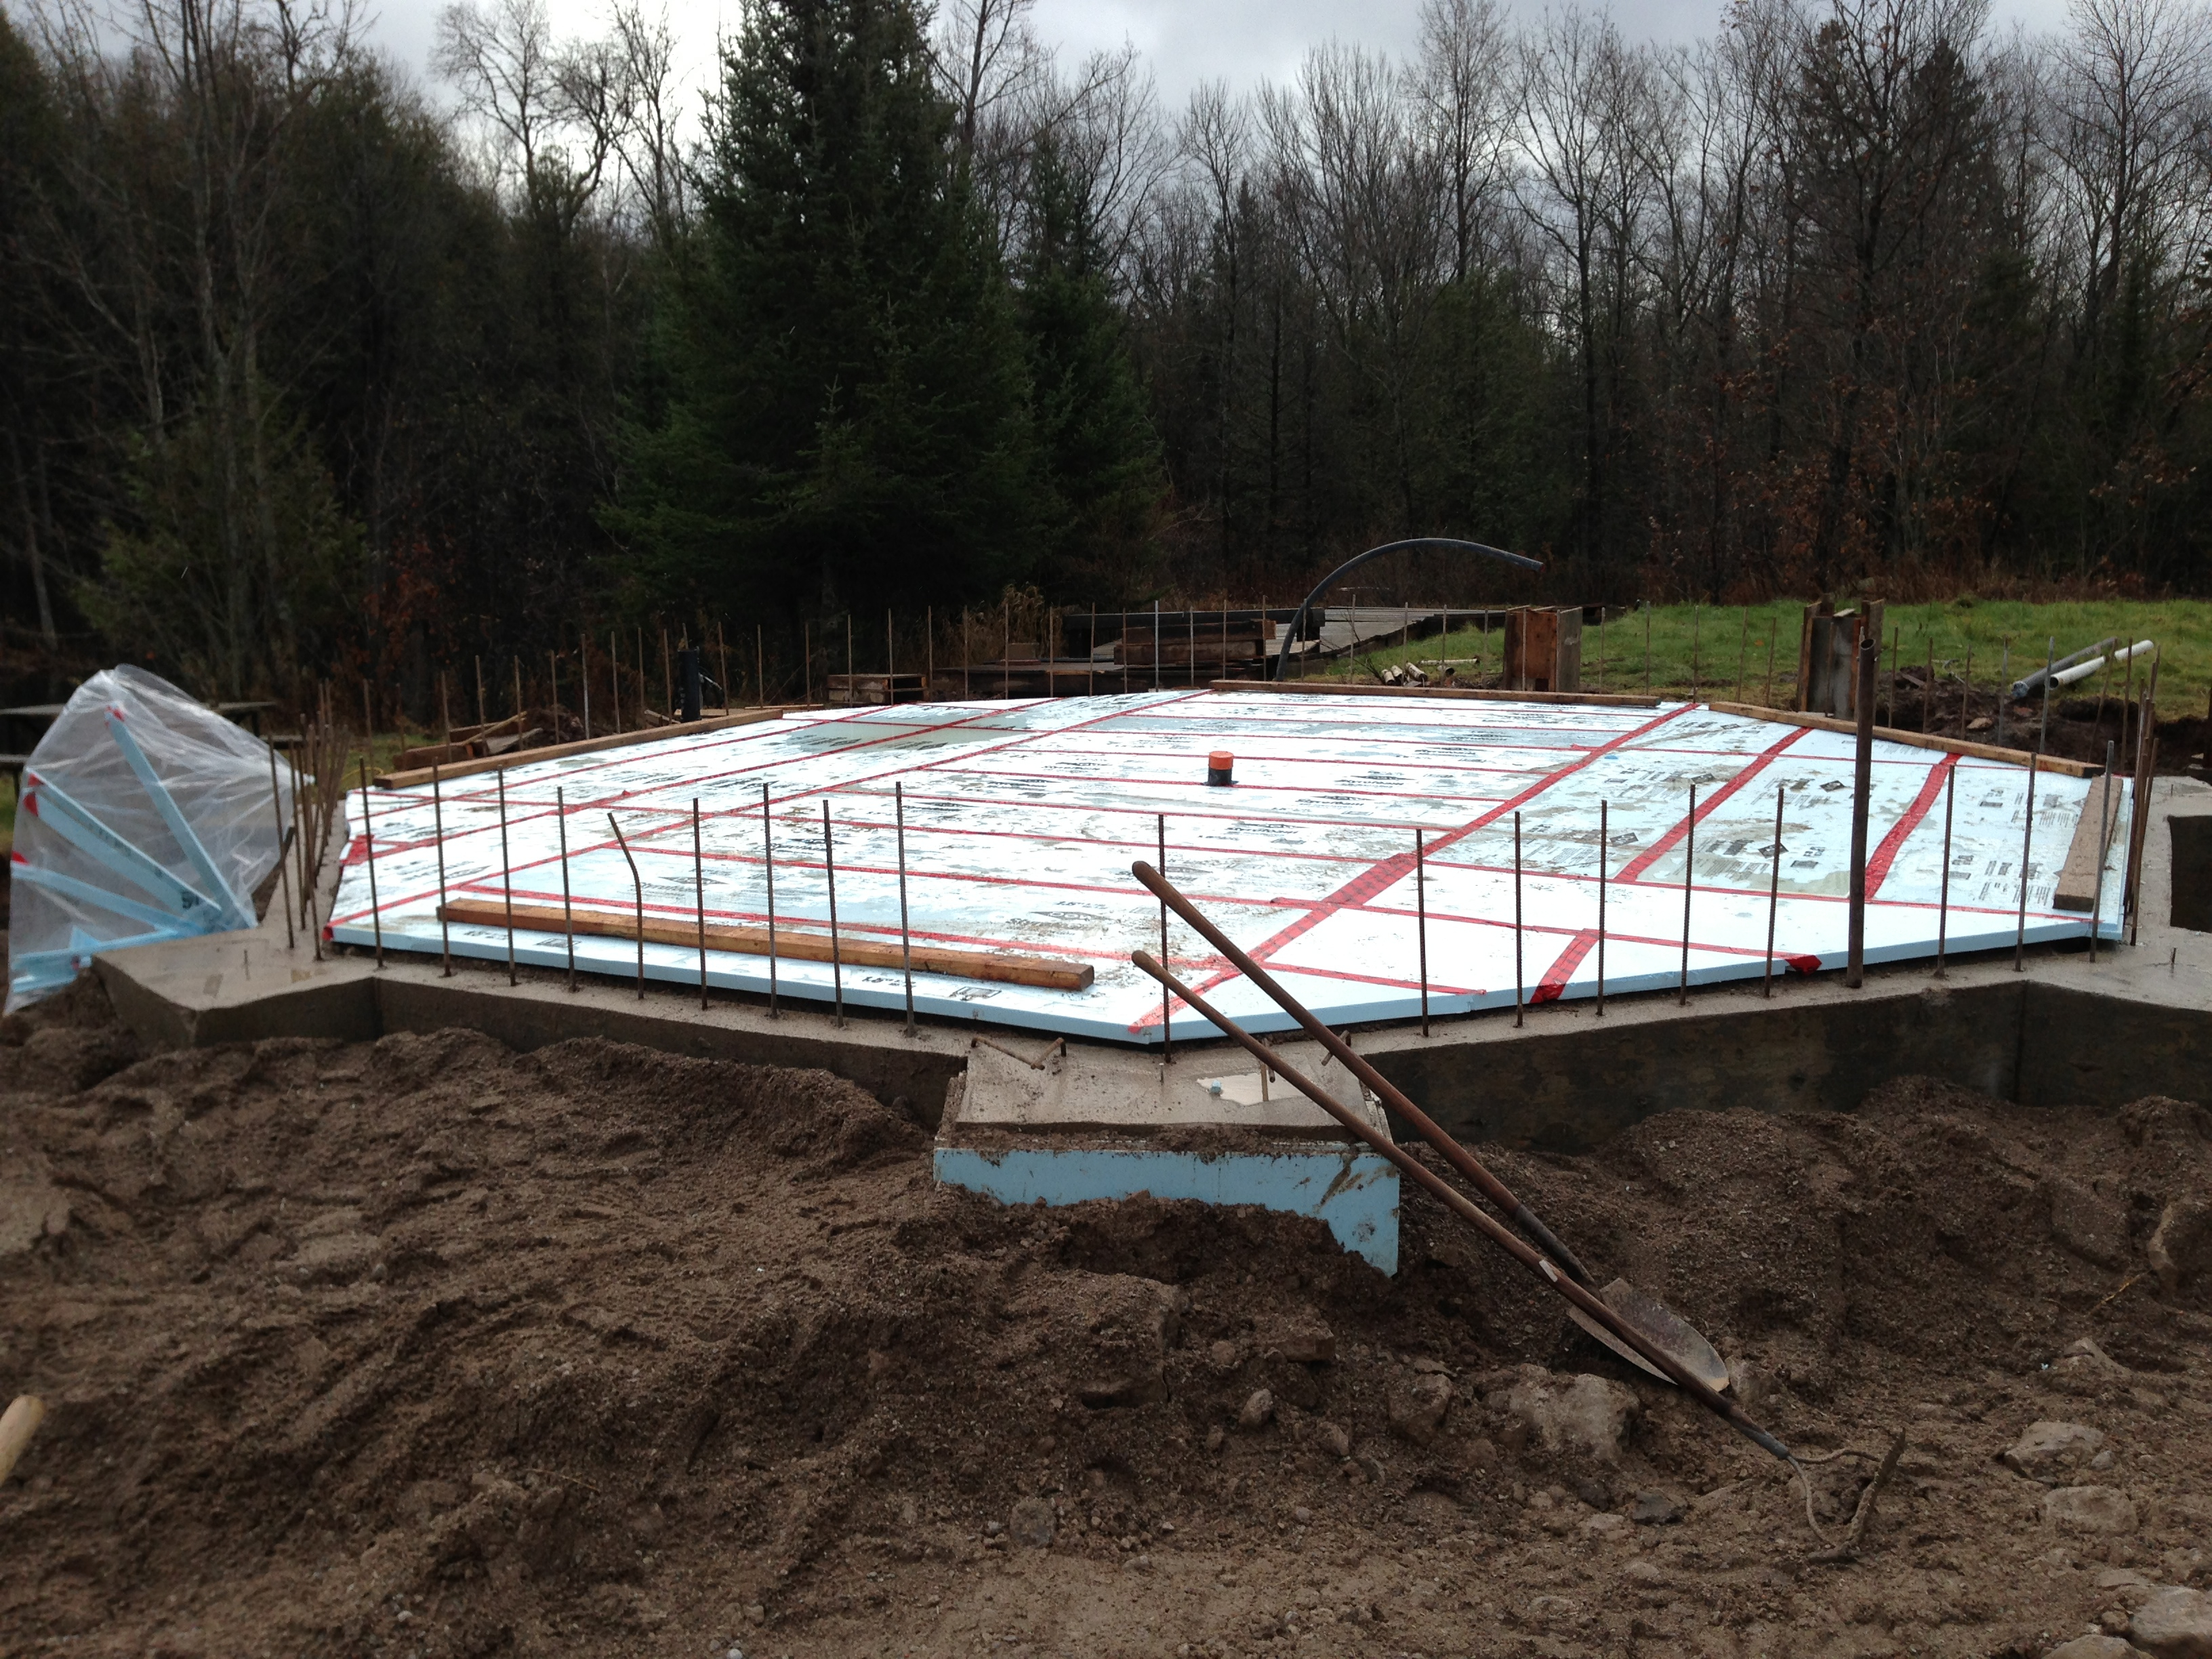
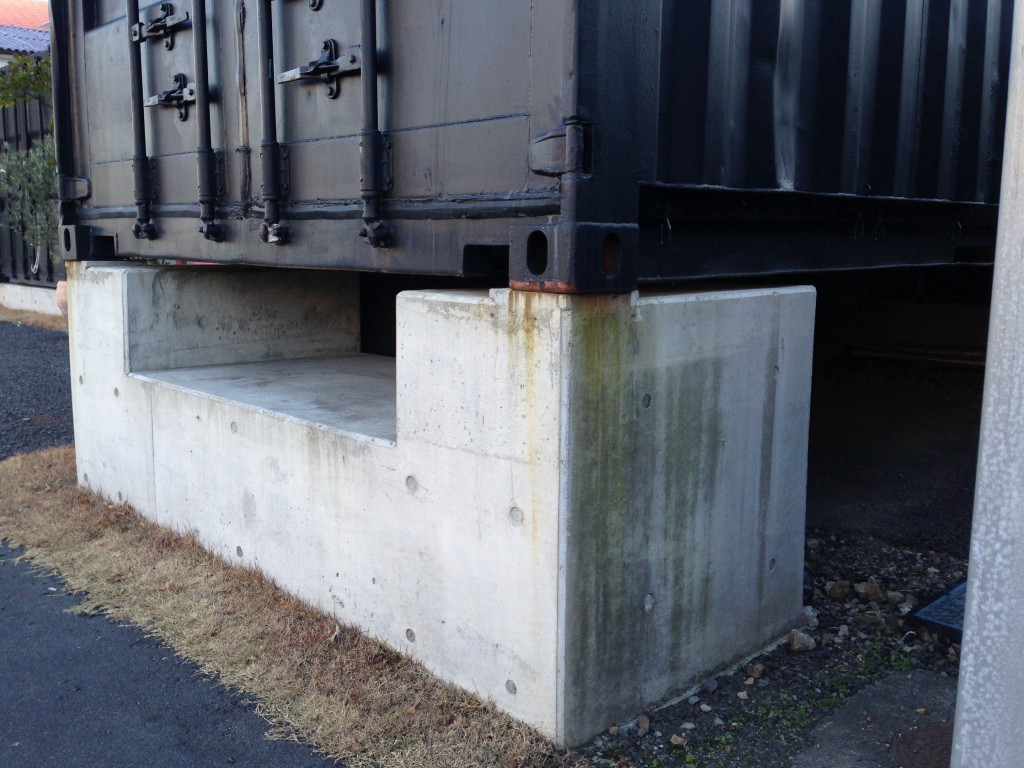
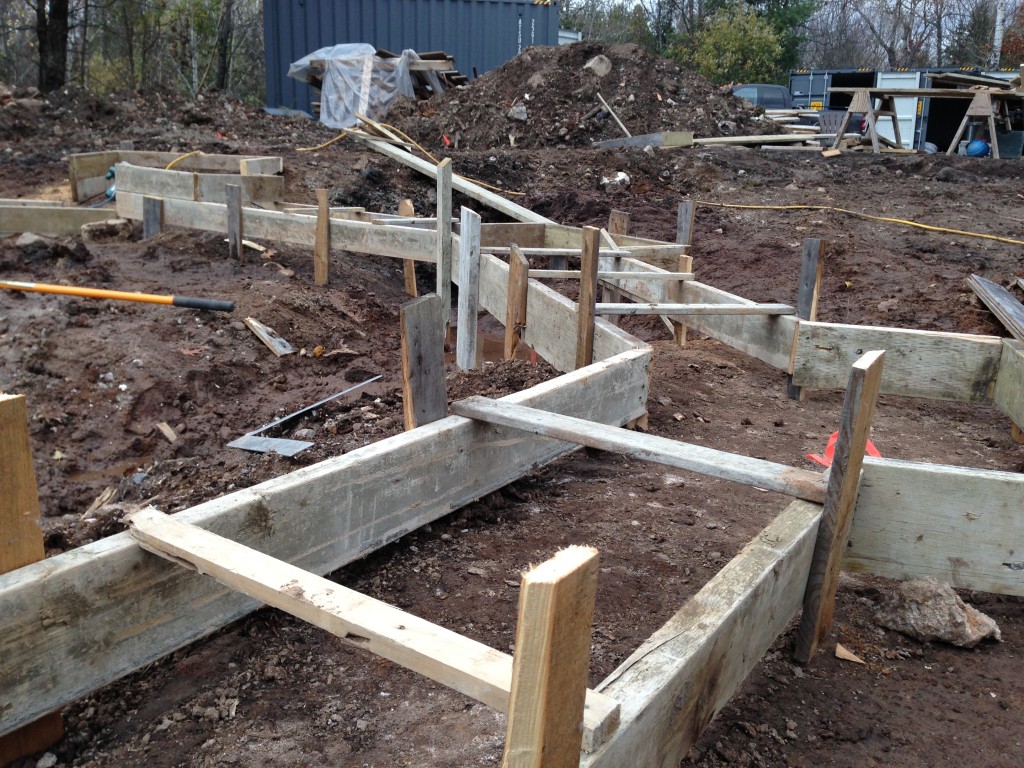
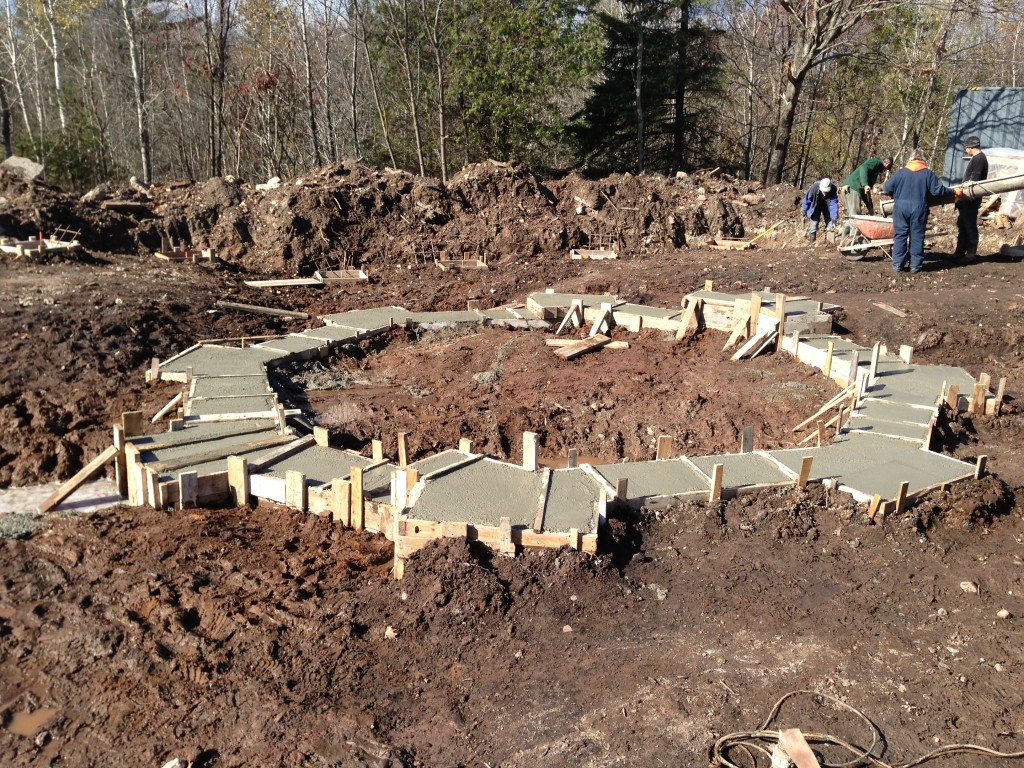
      7. Construction strategies
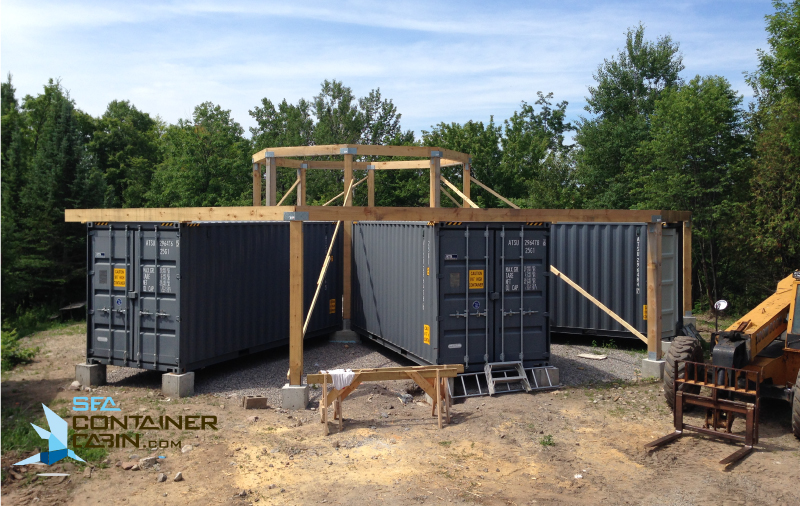
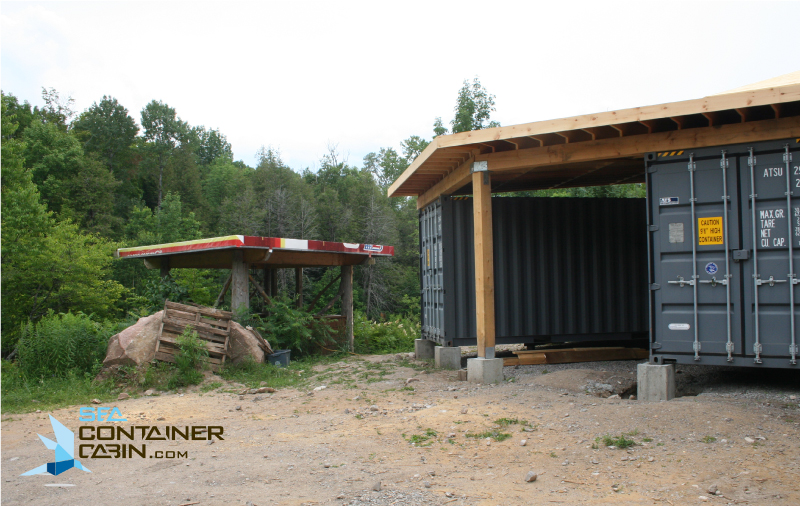
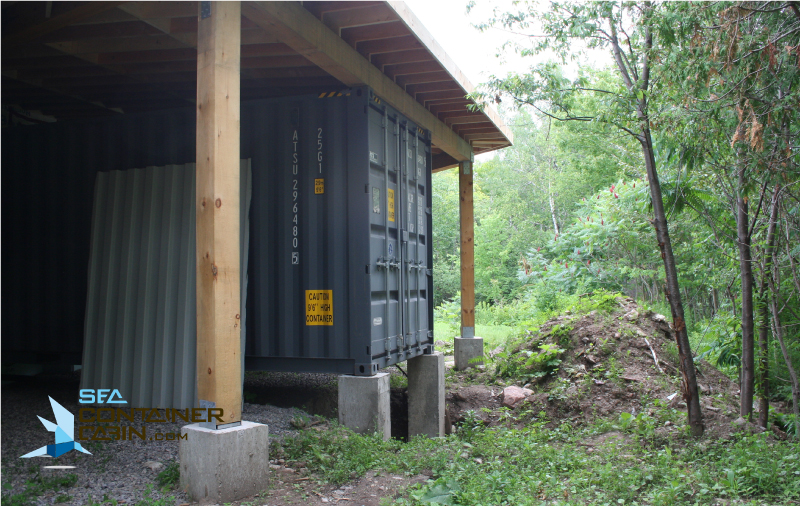
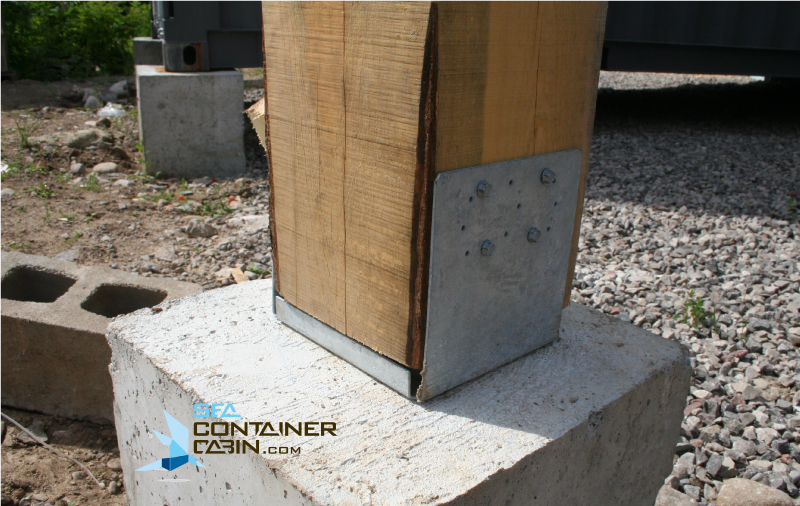
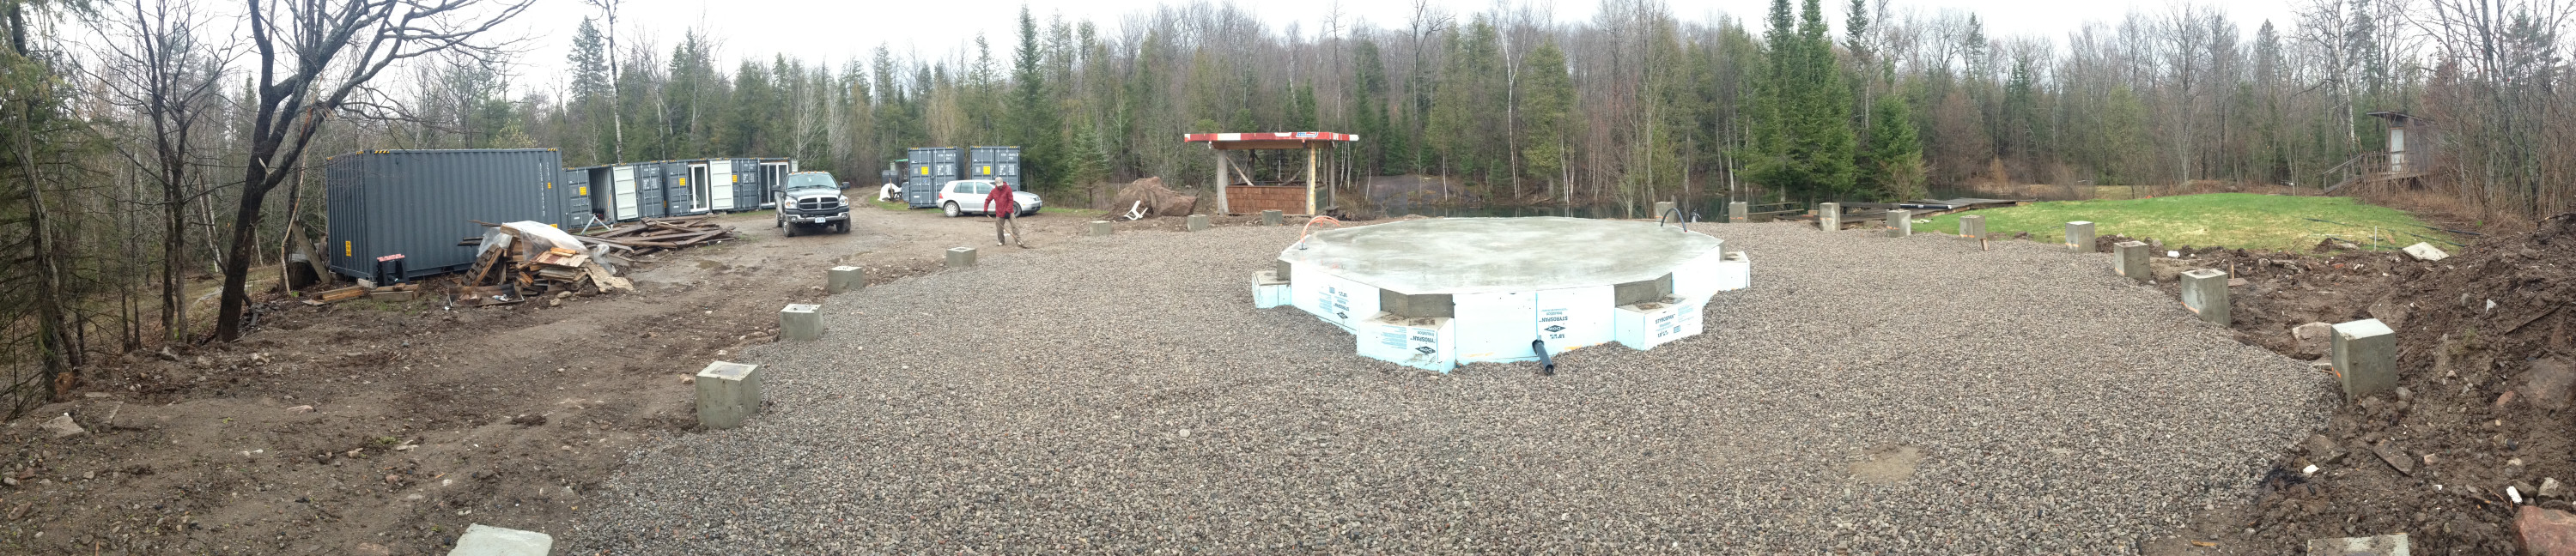
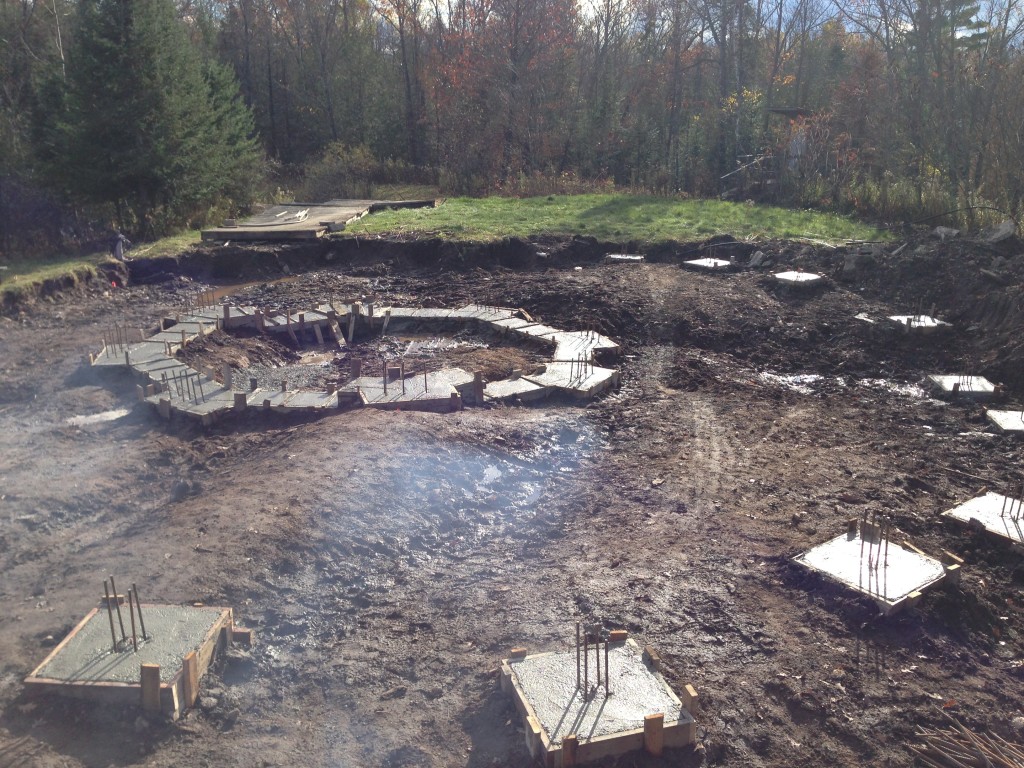
        • Concrete piers and container fastening
        • Container interface and connection
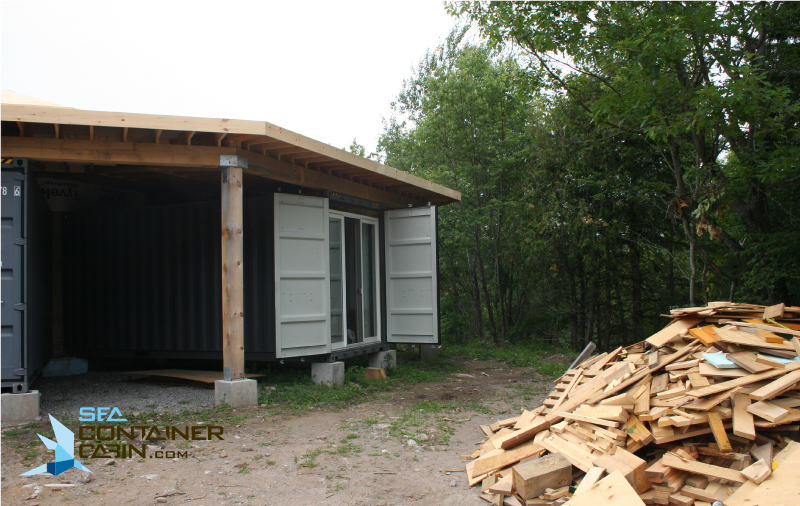
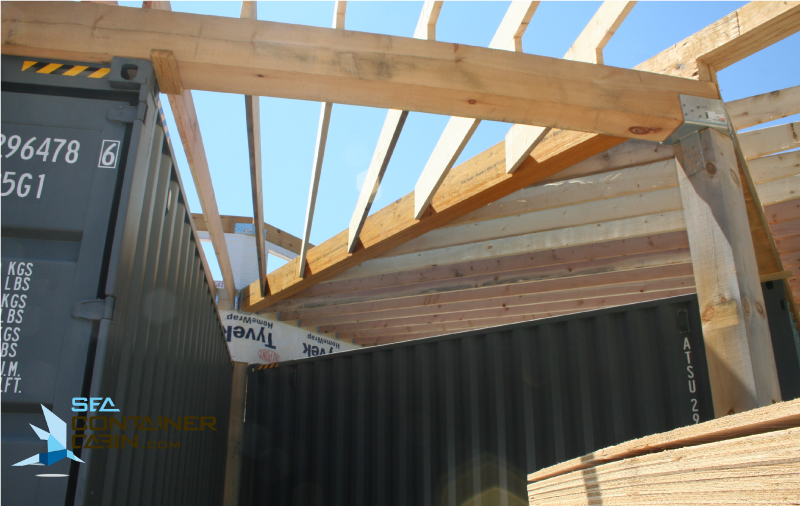
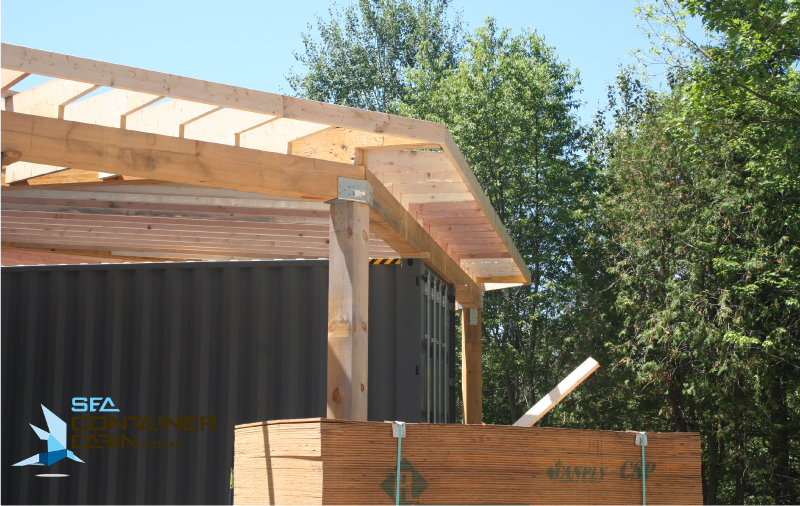
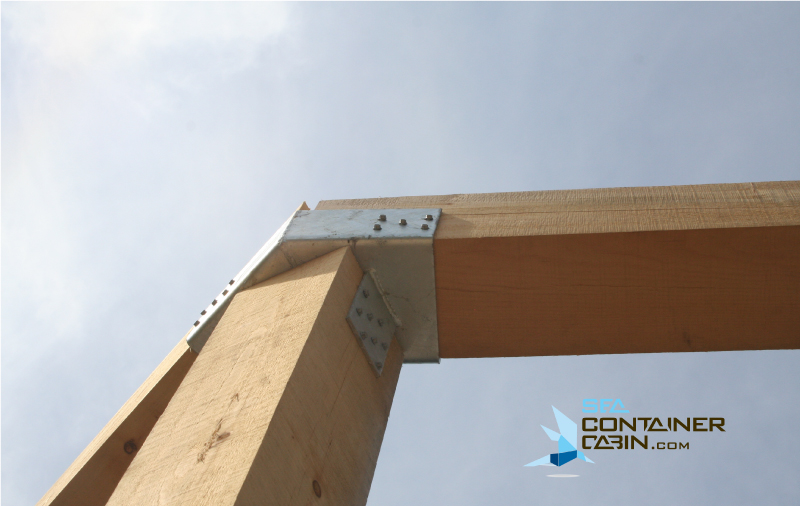
        • Post and Beam structure and fastening
      8. Bill of Materials
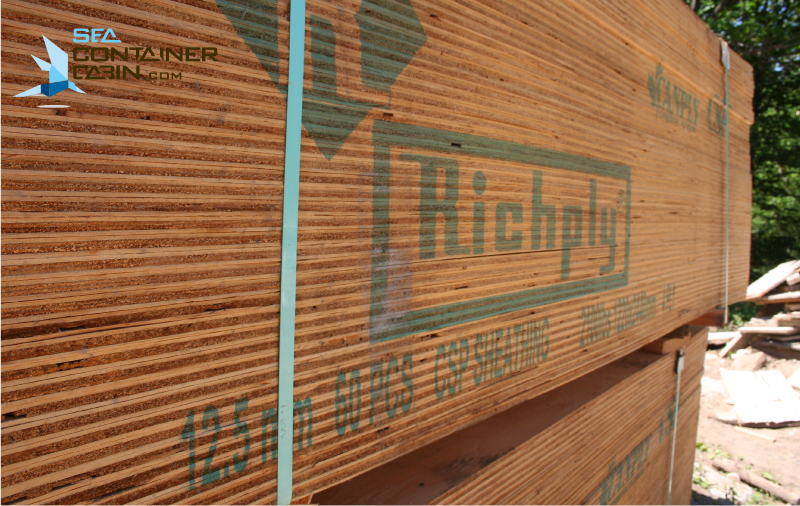
        • Detailed list of construction materials
        • Local suppliers versus big box stores
        • Exercising buying power for materials
      9. Issue Final Construction Plans
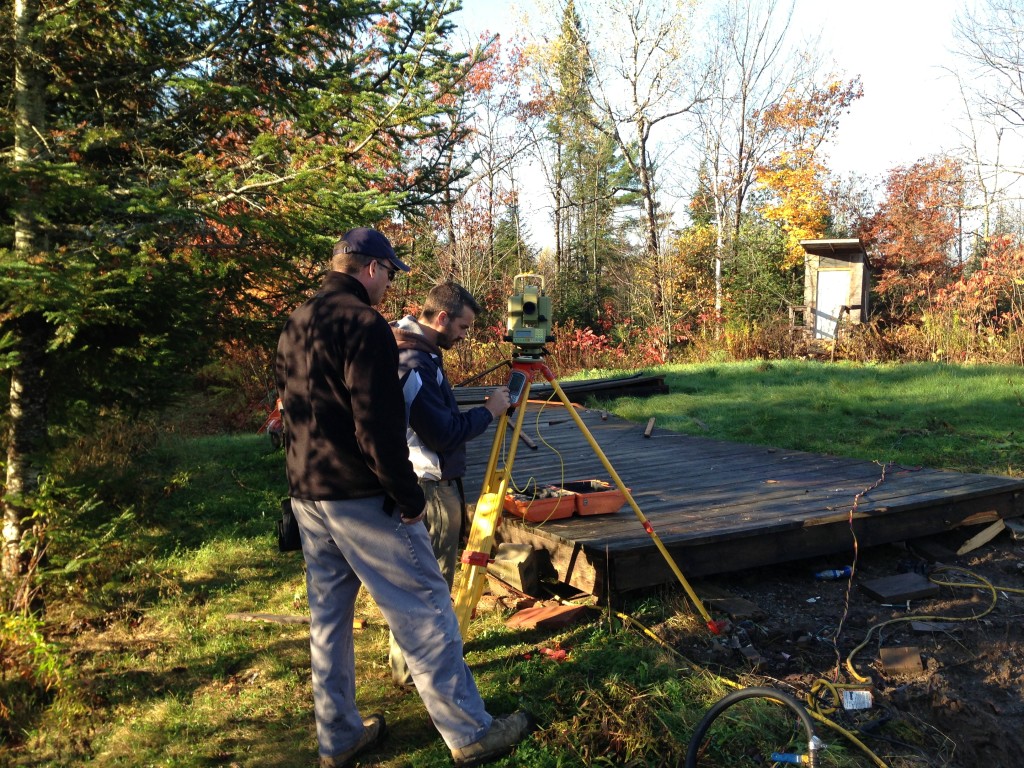
      10. Obtaining Building Permits
        • Building project support with Local Building Officials
        • Building code treatment and structural integrity validation
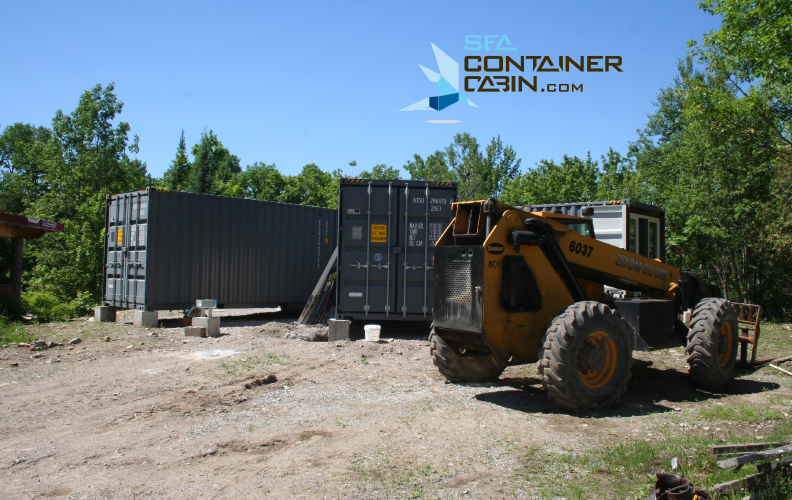
      11. Taking Delivery of Containers
        • Scheduling and accepting deliveries
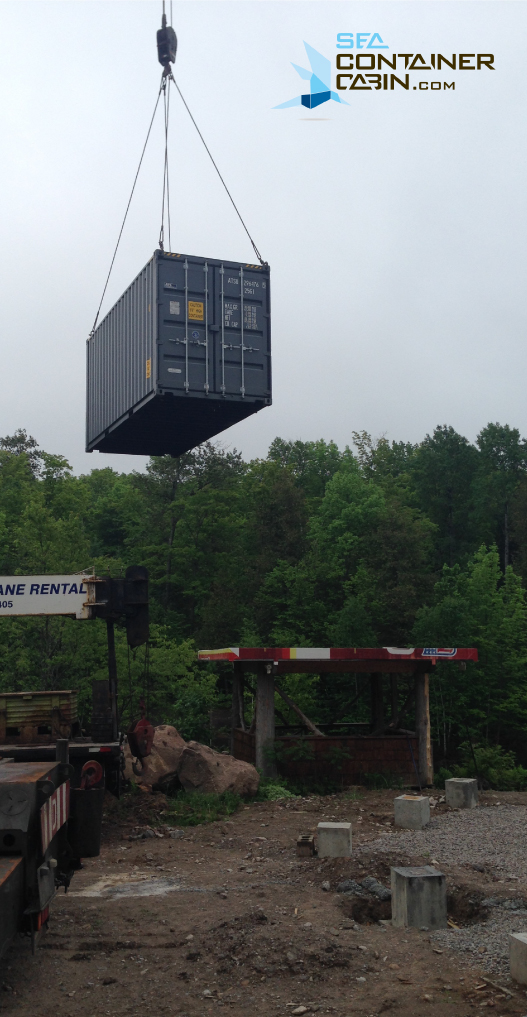
        • Tilt and load truck capabilities and constraints
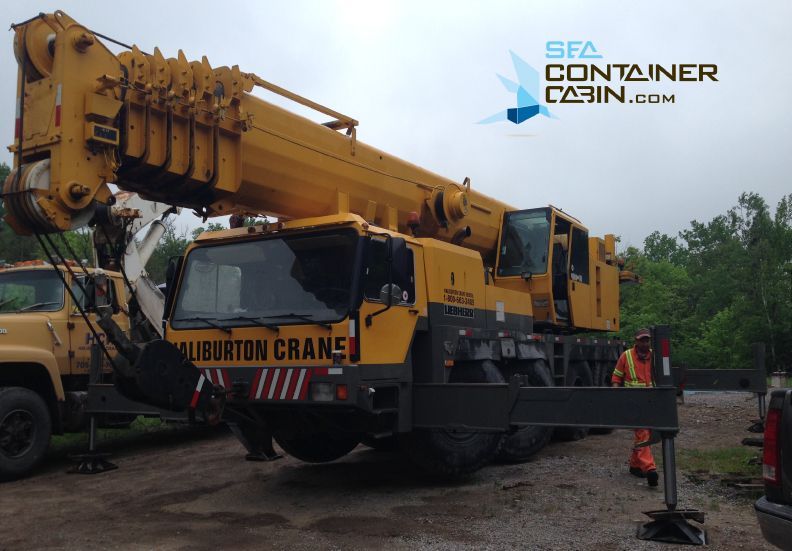
        • Alternative methods to unload and move containers on site
        • Inspections and contingency planning
      12. Project Coaching available from Jason Rioux

Framing of the Shipping Container Cabin Project – Summer 2014

Here’s a look at the external framing pictures from early summer of 2014. Internal framing pictures can be found in our next posting!

Shipping-Container-Cabin-External-Framing-of-Windows-Workbench

Framing of the centre great room – Front Entrance of Shipping Container Cabin

Shipping-Container-Cabin-External-Framing-of-Great-Room-Workbench

Framing of the centre great room – Driveway Entrance of Shipping Container Cabin

Shipping-Container-Cabin-External-view-of-Kitchen-Workbench

Side view from Boat dock of Kitchen and future Sauna

Shipping-Container-Cabin-Front-External-View-Workbench

Perspective of Shipping Container Cabin project Front Entrance from Granite rock face

Shipping-Container-Cabin-External-Overview-Workbench

Shipping Container Cabin – View from parking area of Side Entrance

Shipping-Container-Cabin-External-Doors-Open-Workbench

Future Master Bedroom Container

 Shipping-Container-Cabin-Tiki-Hut-Workbench

Gazebo in progress for outdoor breakfasts. Will also house our Canadian Solar Panels when we install our Off-Grid Power System.

Shipping-Container-Cabin-External-One-High-Cube-Workbench

View of the forest from Floor to Ceiling Second bedroom windows

Shipping-Container-Cabin-Front-Entrance-Deck-Workbench

Deck to Shipping Container Cabin Main Entrance

Shipping-Container-Cabin-Center-Roof-Framing-Complete-Workbench

Scoping out the framing progress and construction site

Shipping-Container-Cabin-Plywood-Materials-Workbench

Bundles and Bundles of Plywood

Shipping-Container-Cabin-Frame-Exterior-Wedge-Workbench

View of a framed wedge – soon to be covered space to store toys and firewood

Shipping-Container-Cabin-Materials-Workbench

Finishing the roof framing of Shipping Container Cabin

Shipping-Container-Cabin-Framing-Workbench

Overhead view of construction site

Shipping-Container-Cabin-Framing-Side-View-Workbench

Expansive 3000 square foot roof

Shipping-Container-Cabin-Post-Beam-Bracket-Workbench

Big timbers and galvanized brackets

Shipping-Container-Cabin-Post-Beam-Bracket-Pier-Workbench

One of many piers poured to support the Shipping Container Cabin structure

If you have any questions regarding the techniques or materials we have used in this project for sale in our DIY kit, please contact us.

The BIG Crane Day

The BIG crane day is the single most exciting day of this project as a lot of visual progress is made in a few hours. In this post, we show you photos of the containers being placed on their foundations, and share  some of the considerations and options available for completing this step in the construction process.

In this project, all the shipping containers were on site for several months as a means for storing furniture, construction materials, and tools. The containers were siting on wooden blocks, awaiting to be moved to their final resting places.

foundation panorama

Panorama shot of the final foundations after backfill and grading – click to enlarge

4 options for placing shipping containers

In order of price, but also lowest flexibility we have listed some options for placing containers below:

  1. Tilt and load flatbed trucks: These are the trucks that typically deliver 20′ containers and are the lowest cost option. They have the flexibility of unloading a container without any assistance of forklifts or cranes. On the down side, they are limited to dropping the containers and need a 60′ straight run way from the container unloading position. In this project, the land around the OCTOPOD is tight with natural drop offs and water, and therefore this method will not work.
  2. Off road forklift: Heavy duty forklifts capable of lifting containers and traversing soft and uneven gravel terrain. Again, given the limited ability to traverse around the foundation area, this was not a practical option for this project. However, in other projects with wider lay down area, an off road forklift can be used as long as the forks are wide enough and long enough (8′) to fit into the container fork lift pockets. If using this method, the forklift is limited to lifting the containers from the 20′ long side only.
  3. Small crane: Smaller cranes are lower to hire per hour in cost than large cranes but have limited reach capability and may take longer to complete the job if they need to move and reposition themselves for a second lift of the same container. When lifting containers or any other heavy objects, many cranes can lift them straight up but as you reach out, the laws of physics kick in and have the effect of requiring larger lift capacities to perform the work.
  4. Large crane: Larger cranes cost the most to hire per hour but have the greatest reach and can complete the job in less time and with ease. In this project, we wanted to be able to reach almost 100′ away from the crane location for the furthest container placements.  After being set up, the seven containers were moved into place with safety and precision in a few hours. 

crane-shipping-container-cabin-workbench

Large 90 ton Crane for BIG Crane Day

craning-shipping-container-cabin-workbench

Shipping container being craned into position

positioning-4-shipping-container-cabin-workbench

4 of 7 Shipping containers placed on foundations

positioning-shipping-container-cabin-workbench

All 7 Shipping Containers Cabin sitting on foundations

Click Time Lapse VIDEO of the BIG Crane Day!

Optimize the benefits of building with shipping containers.

We have figured out the tricks to building homes out of shipping containers in cold environments while meeting Ontario building code. Contact us for your DIY shipping container kit so you can prepare yourself to build your very own permanent shipping container home.

Minimizing Foundations Work with Shipping Containers

In Building Foundations for a Rocky Landscape, we completed the footings and now we will share how we completed the foundation work and our reasons why we poured concrete for the octagon in the centre of the Sea Container Cabin.

Replacing standard foundation building methods with piers

If you want to minimize foundations work with shipping containers, you can skip the standard foundations used in traditional building methods and use piers instead resting the corners of your shipping containers instead of having to support the perimeter of your structure. With a clean set of footings to build on, the forming of the outer box piers and the centre octagon takes place. The centre octagon has structural box piers located at each of the octagon points that hold one end of the containers. There are 20 outer box piers that hold the outer ends of the containers and supports the outer posts and beams for the roofing system.

Choice of floor construction for the great room

In the Concept & Design section, we describe the features of our centre octagon great room.  This great room could be designed with a suspended wood floor system, or with an elevated concrete slab on foundations. We selected a concrete centre hub for the following reasons:

  1. Permanent long term durability
  2. Invincible to damage from beneath from insects and animals (carpenter ants and porcupines love to eat wood!)
  3. Ability to heat a thermal mass with in floor radiant heat piping in an insulated concrete slab
  4. Superior weight load capabilities for heavy wood stoves
  5. Waterproof for winter gear drying in front of a fire, and in the event of a leak from the interior water tower there’s a floor drain in the centre

 Images Capturing Step by Step Foundations Work

sea container cabin foundations 1

 Centre octagon forms with structural box piers and concrete curtain walls

sea container cabin foundations 2 centre octagon

Structural box piers with embedded steel welding plates

sea container cabin foundations 3 box piers with steel welding plates

Centre octagon after concrete forms removed

sea container cabin foundations 5 centre octagon finished walls

Rebar floor ties inset into octagon foundations (Picture 1)

sea container cabin foundations 6 octagon floor ties

Rebar floor ties inset into octagon foundations (Picture 2) 

sea container cabin foundations 7 with airbook

Outer box pier concrete forms

sea container cabin foundations 8 outer box piers

Centre octagon backfilled, compacted, and insulation laid

sea container cabin foundations 10 back filled and insulated octagon

In floor heat piping installed before concrete floor is poured

sea container cabin foundations 11 in floor heat piping

Completed foundations, great room octagon floor, backfilled, and graded

foundation panorama

 Panorama of Sea Container Cabin site – click to enlarge

Optimize the benefits of building with shipping containers for more than foundations work

We have figured out how to optimally build homes out of shipping containers in cold environments while meeting Ontario’s building code. And after we figured it out, we wrote about it. Contact us for your DIY shipping container kit so you can experience what’s behind building your own permanent shipping container home.

Sourcing Timbers and Brackets for our Post and Beam Great Room

This past winter was the coldest Ontario has seen in 20 years. Spring is officially here however the nicer weather hasn’t exactly arrived yet. After checking in with our builder, it appears we’ll need a little more patience before the roads dry up allowing us to get back into the construction scene.

During our planned sea container construction downtime, we have been busy preparing for our next steps.

1. Source big timbers

We believe in local sourcing to support the community and to reduce shipping costs. These savings will ultimately reflect in our final construction costs so we searched for a nearby sawmill with the capacity and capability to mill up dimensional timbers as large as 10″ x 10″, and some as long as 26 ft.  Sure enough, just one concession road over from the project site, our friendly local sawmill was up for the task.  Timbers of this size require a long lead time. Our order was placed months ago in order to align with our spring construction period.

2. Source heavy steel brackets

Another long lead time item are the custom heavy steel brackets for connecting the post and beam timber works.  For ease of on site assembly, and for the beefy rustic look, we decided to go with heavy steel brackets instead of custom fit hand carved joints.  Once the final dimensions of the rough sawn timbers were confirmed, design and engineering of the brackets were finalized, and off they went into the fabrication shop for manufacturing, and over to the finishing shop for a hot dipped galvanized treatment.

Now we wait for the ground to dry up.

Once we mobilize the crane, the containers will be placed on their foundations. Then we start building the great room.

The following preparation and progress has occurred while the site lay in winter hibernation:

  1. Post and beam timbers sourced and cut, ready for delivery
  2. Manufacturing of enormous engineered brackets and hot dip galvanizing, ready for delivery
  3. Researching off-grid power and determining requirements of the cabin, keeping us busy –  interesting findings on the latest energy storage technologies post to follow
  4. Documenting interior design requirements so that a furniture, electrical and lighting plan could be created to optimize the living space. We have an exciting interior designer engaged – deserving of her own dedicated post.
  5. Did we mention we’re hoping to have the sea container cabin project filmed for a TV series?  Film producers are excited about the rich content of this project, so we’ll see if they can keep up with the speed of the build this summer.

white pine timbers for sea container cabin

First load of timbers for the great room are waiting to be delivered.

If you would like greater detail on any of these topics or just want to hear more about our experiences, contact us or leave us a comment below. Your interests do influence our future community blog topics. You can also follow us on our journey by signing up for our emails.

Spotted in Shizuoka Japan

Once you are in the business of building with shipping containers, you can’t help but notice these types of projects when traveling the world. We were recently in Shizuoka Japan, and drove by a retail storefront that caught our eye. A series of containers were painted black, placed along both sides of this building and have been integrated in a way to provide furniture and goods storage. I was particularly impressed with the beefy foundations and fastening detail they employed. What a neat find. If you come across anything neat, please let us know so we can share with our community of shipping container architecture enthusiasts.


Japan shipping container

Japan shipping container

Building Foundations for a Rocky Landscape

Old man Winter was finding its way quickly into Southern Ontario and we were knee deep in building foundations for our shipping container cabin. The Bobcaygeon area is known for rocky terrain with a clear presence of cambrian and pre-cambrian geology. The entire foundation area was excavated and scraped down to the granite bedrock. Due to the uneven rock terrain, we decided bringing in surveyors to accurately locate the centre octagon points and outer piers would be a worthwhile investment. After all, it isn’t exactly easy to undo concrete work.

Concrete forming commenced for the footings, with some crafty carpentry work to follow the natural granite. Rebar pins were drilled into the granite for all footings. Rebar reinforcements were inserted into concrete footings and with projections for foundation walls and piers to come next. Let’s just say these piers are securely fastened to mother earth and we won’t have any concerns for foundation settlement, that is for sure. And just in the nick of time with winter settling in!

 excavated area

Excavation of shipping container cabin site

survey pins 2

Construction plans for shipping container cabin

surveyors 1

Surveyors to accurately locate piers

surveyors 2

Measurements and anchoring to the rock foundation

survey pins

Straightening metal spikes from the disassembled barn for transformation into markers

surveyors 3

Marking our locates

footings 2

Crafty centre octagon form building

footings 6

Initial octagon cement pour

footings 7 done

Aerial view of future Octopod

Do you have any questions regarding building foundations in our project? We’d be happy to share our learnings. In fact, there’s been so much interest in our project we are putting together a free of charge sneak peek of our Do it Yourself Shipping Container Cabin kit. Sign up for our blog if you’d like to be the first to know once it becomes available. Or leave a comment.

Demolishing the old to make room for our new shipping container cabin

Demolition time has arrived.

The excavator and our seasoned contractor George are making quick work of what is otherwise a mountain of carnage.

The old cabin was rotted from beneath, but it was built tough. Demolishing the old revealed that this little cabin had multiple layers of material in every part of its construction. The floors were composed of steel beams, joists, tongue and groove subfloor, SM foam, plywood, and finally topped with hardwood flooring. The walls were tongue and groove pine on the interior, studs, fiberglass insulation, tongue and groove board exterior, tongue and groove wood siding, topped with an extra layer of cedar board and batten. The ceiling to roof was composed of tongue and groove pine ceiling, studded partially vaulted ceiling, fiberglass insulation, roof rafter joists, tongue and groove board roof sheeting, asphalt shingles, wood strapping, steel roofing. The amount of material to dispose, recycle, reuse and burn was equivalent to 2 or 3 such structures.

Looking forward to starting our foundations next.

demolition0

demolition1

demolition2

demolition3

If you have any questions about our demolition experience, please contact us or leave a comment below. You can also follow our project and be the first to know what’s going on by signing up for our blog.

Toronto’s Sea Container Hat Trick

Three commercial shipping container establishments have hit the streets of Toronto. Two are here to stay. One is on it’s way out to do some globetrotting.QQseacontainervendors

  1. At Toronto’s waterfront there are some fancy food vendors located on Queens Quay. I particularly liked the attention to detail they added to each vendor unit with barn boards and other neat treatments. Dundasvendorcontainers
  2. A budget friendly and small entrepreneur kick-starter strip of shipping container businesses, ranging from niche foods, drinks, and even a bicycle service shop.JMSonsshippingcontainer
  3. Handy furniture makers displaying their products for sale.

How Shipping Containers Are Made

This is the best video I have seen which shows how shipping containers are made in China.  This is a well refined, complete multi-step manufacturing process that is shockingly quick and well done.